致读者
weex 有风险,入门需谨慎。
入门
Hello World
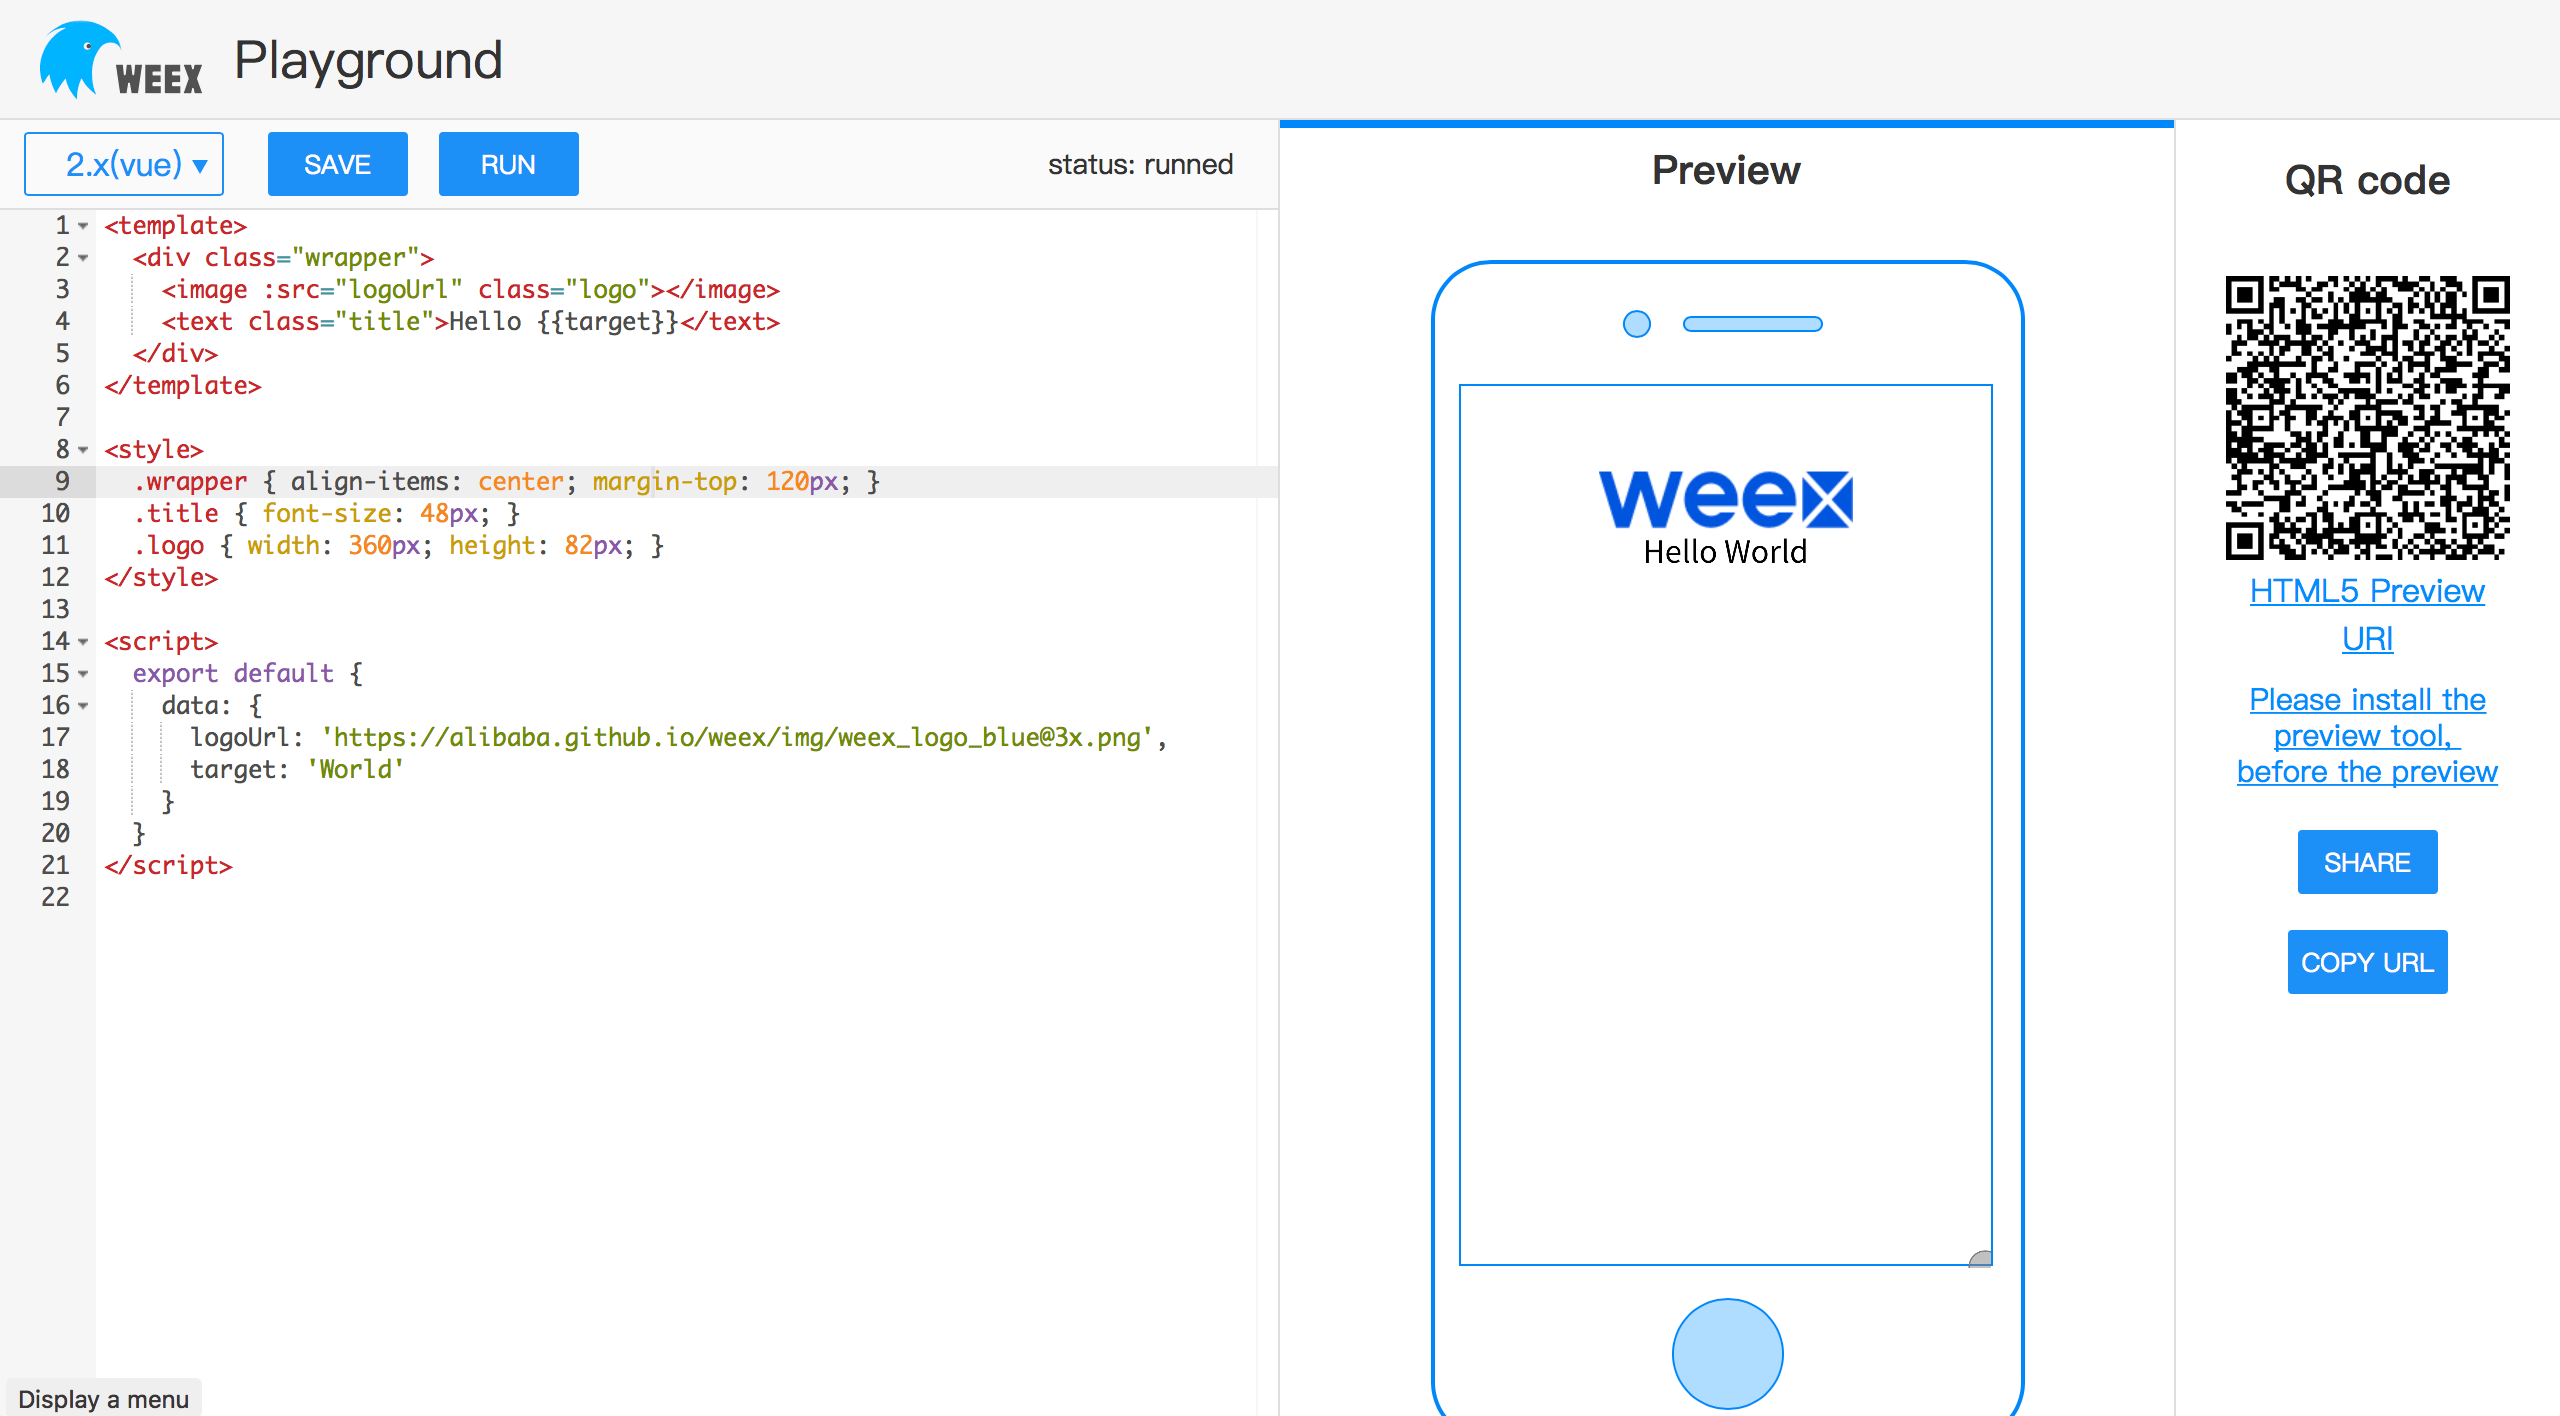
什么都不装,先到 dotWe 中看看效果:

这是一段 vue 的代码,一个图标和一行文字:
1 | <template> |
将其贴在左侧代码区,点击 RUN 即可在 preview 区看到 Web 实现的效果。如果要看 Native 版,则可以下载 Weex Playground,安装到手机中后扫描右侧的 QRCode 即可。
dotWe 只能运行一个 vue 文件,做单个组件的测试还是可以的,在实际业务应用的时候明显是不够,因此我们需要一个完整的工程项目。
初始化
在已经有 Node 的前提下,安装配套工具并初始化项目:
1 | npm install -g weex-toolkit |
注:我这里使用的版本是 weex-toolkit(1.0.5)
运行
Web
开两个命令行分别运行:
1 | npm run dev |
1 | npm run serve |
看到 serving /Users/hans/workspace/weex-challenger on port 8080 即可打开 http://127.0.0.1:8080/。然而很不幸页面是空白的,因为还有一个 commit 没有发布。所以我们只要同样改一下 weex.html 的 15 行 weex-vue-render 的路径即可:
1 | <script src="./node_modules/weex-vue-render/dist/index.js"></script> |
👈 左边的预览窗口就会出现 weex 的 LOGO。完整代码请看 这里。

Native
同样使用 Weex Playground 扫描上面 http://127.0.0.1:8080/ 中的的二维码,即会在 Native App 中打开一个新的 Page 显示上面相同的界面。
单页面应用
SPA 的应该是一个很常见的需求,我们现在就在默认的初始化项目上使用 Vue 全家桶实现一个简单的单页面应用。
vue-router
假设我们的场景是有 Foo,Bar 两个 Tab,点击分别进入两个不同的页面。首先我们要有一个入口组件承载 app.vue:
1 | <template> |
其中 jumpFoo 和 jumpBar 是使用 Weex 官方限制 的 编程式导航 的方式来实现页面跳转。
在 router.js 文件中,我们给 FooView 和 BarView 绑定对应的路径 /foo 和 /bar:
1 | import Router from 'vue-router'; |
最后在入口文件 app.js 中绑定 App 和 router:
1 | import App from './src/app.vue'; |
发布
因为玩过 React Native,打包成一个应用本是一件不复杂的事情,然而在 weex 中就没那么规范了。
weex-toolkit 虽然已经集成了 weexpack 的功能,但二者初始化出来的项目完全不同。也就是 weex-toolkit init != weexpack create,以致于后面的 weexpack platform 也无法继续。暂时没空折腾了。。。
